


Preface
Are you wondering how to design a PCB? The process of designing a printed circuit board can seem daunting at first, with its intricate layout and technical requirements.
But fear not as in this complete guide, we are here to demystify PCB design and empower you to tackle it with confidence.
Whether you are a beginner venturing into the world of electronics or an experienced designer looking to refine your skills, this article has got you covered.
So, let’s get started.
PCB Design and Its Role In Electronics
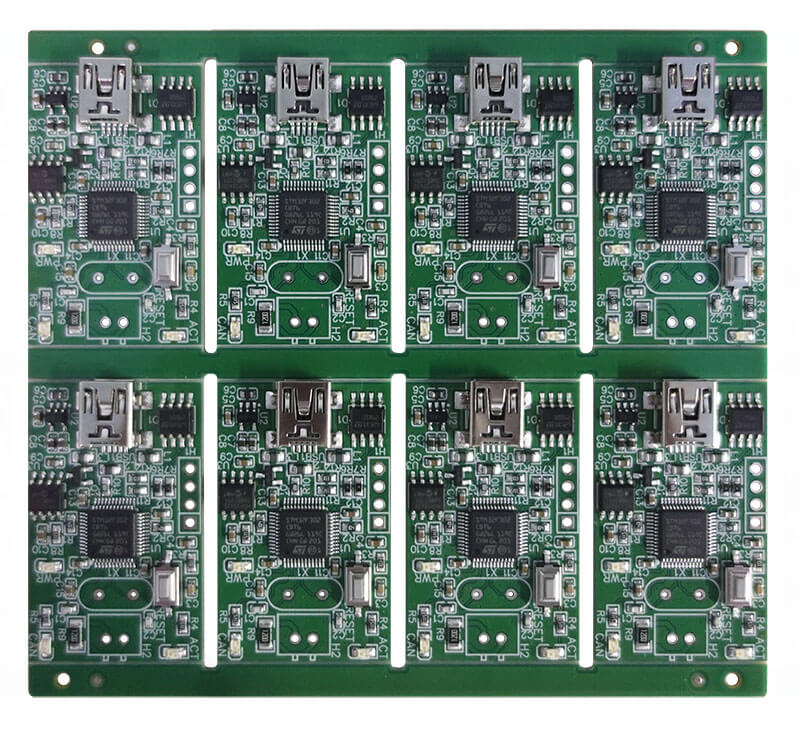
Printed Circuit Board (PCB) design is the most vital subdivision of electronic engineering, in which a layout is designed to list electronic components and their connections on a non-conductive substrate.
It is a complex and vital process since its failure directly influences the functioning, reliability, and manufacturability of electronic devices. In other words, PCBs are the construction of modern electronics, enabling electrical signals to move amidst other components such as transistors, resistors, and integrated circuits.
In this regard, it plays a central role and is the key element in integrating the various electronic parts into a common, working system.
Today’s PCB design has undergone several major evolutions to be able to have multi-layered, complex boards capable of handling high speed data transmission and miniaturization in our tech driven world.
These have been the basics for the development of current devices such as smartphones, computers, and medical equipment. PCB design is a thoroughly engineering-based process; it requires a deep understanding of the principles of electrical engineering, and while doing that, it puts an eye on physical layout, thermal management, and electromagnetic compatibility.
In light of the current rate of technological progress, cutting-edge PCB design can only gain value with the years and be at the forefront of pushing the limits of what is possible in technology.
Now you know the importance of PCB design, it’s time to learn how to design a PCB.

Key Stages of PCB Design
There are some most important key stages of PCB designing that will help you understand the whole process:
Step #1: Schematic Capture:
The first stage of PCB design, Schematic Capture, is where the journey from concept to creation begins. In this phase, designers translate the abstract idea of an electronic circuit into a detailed schematic diagram.
This diagram is a graphical representation that outlines all the electrical connections between various components, such as resistors, capacitors, and integrated circuits. It’s a crucial blueprint that guides the entire PCB design process, ensuring that every component is correctly interconnected.
Designers use specialized software to create these schematics, which allows for precise control over the circuit’s functionality and helps identify potential issues early in the design phase.
Step #2: PCB Layout:
PCB Layout is the second stage where the schematic diagram is transferred into a physical board design.
Here, exact coordinates of component placement on the PCB and routing of copper traces, allowing the electrical connections, are done. It is at this stage there is a tightrope walk between performance optimization and the various constraints due to manufacturing.
These include signal integrity, power distribution, thermal management and electromagnetic compatibility. The layout phase of the design is, therefore, as much an art as it is a science; the designers are required to take some critical decisions that eventually determine the performance of the PCB.

Step #3: Design Rule Checking (DRC):
The third stage is Design Rule Checking, being a very important point of quality control. Design rule checking, or DRC, passes the PCB design through a set of predefined rules supposed to ensure that the board is created in respect of manufacturing specifications.
The rules include, but are not limited to, trace widths, the space between components, and via sizes. DRC identifies and corrects potential issues that could lead to the PCB not being properly manufactured.
Problems might include a short, an open, or not having proper component clearances to avoid board failure.
Step #4: Bill of Materials (BOM) Generation:
Fourth in the order comes the generation of the Bill of Materials (BOM) by the designer. A designer does a summary of all components used in the PCB. The BOM includes detailed information like part number, description, quantity, and reference designators.
It is an essential document to be used during component procurement and inventory management.
A properly prepared BOM will ensure that the process of assembly is smooth since all needed components are readily available in the right quantity and specifications.
Step #5: Gerber File Generation:
Finally, the fifth stage, Gerber File Generation, marks the completion of the design process. Gerber files are the industry-standard format used to convey the PCB design to the manufacturer.
The Gerber file carries all details about how the PCB should be made: details of copper layers, details of solder masks, and details of silkscreens. Gerber file generation has to be correctly done because an error in these files will cause a manufacturing error.
If Gerber files could be verified upon successful completion of the PCB design job and are set for submission to the manufacturer, then a check is run, and when okay, the PCB design work is over and production starts.
Each of these stages is linked with another and crucial to make a success of the final PCB: a mistake in one can quite easily knock on to effect problems that lead to very costly redesigns or worse, a non-functional board.
Therefore, the notice of small details and best practices is very important for a PCB design.
Popular PCB Design Software for Every PCB Designer
When it comes to PCB design software, there are several excellent options available.
Some of them are:
1.Altium Designer:
Altium Designer is a powerful and user-friendly software for designing PCBs. It’s known for being easy to use and offering lots of features like drawing circuits and laying out the actual boards. Professionals often choose it because it has everything they need in one place.
2.KiCad:
KiCad is free software that’s great for beginners and experts alike. It’s simple to understand and has tools for making both simple and complex circuit boards. Many people like it because it’s open-source, meaning anyone can contribute to making it better.
3.EasyEDA:
EasyEDA is an online tool for designing PCBs. It’s super easy to use – you just drag and drop components onto your board. Plus, you can work with others on the same project in real-time, which is handy for teamwork.
4.Upverter:
Upverter is a cloud-based platform for designing PCBs with your team. It’s really good for working together on projects because everyone can see the changes in real-time. Plus, it has lots of built-in parts and templates to make designing easier.
5.DipTrace:
DipTrace is software that’s good for both beginners and pros. It has all the basic tools you need to design a circuit board, like drawing schematics and laying out the board. Plus, it works well for more complicated designs too.
Addressing Common Challenges
Designing a PCB comes with its fair share of challenges, but with the right approach, these obstacles can be overcome. Here are some common challenges and how to tackle them:
Component Placement Considerations:
One of the key challenges in PCB design is deciding where to place components on the board. Strategic component placement is crucial for optimizing signal integrity, thermal management, and overall board functionality.
To address this challenge, consider the following tips:
- Group related components together to minimize signal interference.
- Place critical components closer to power and ground connections for better signal stability.
- Leave adequate space between components for efficient routing and accessibility.
Signal Integrity Concerns:
Maintaining signal integrity is essential for ensuring reliable communication between components on the PCB. High-speed designs are particularly susceptible to signal integrity issues such as reflections, crosstalk, and impedance mismatches.
To mitigate these concerns:
- Use controlled impedance routing for high-speed signal paths to minimize signal degradation.
- Implement differential signaling techniques to improve noise immunity and signal integrity.
- Pay attention to signal return paths and ground plane design to reduce electromagnetic interference.
Following Proper Design Rules:
Adhering to design rules and standards is critical for ensuring the manufacturability and reliability of PCB designs. Design rules specify parameters such as trace widths, clearances, and minimum feature sizes that must be followed to meet fabrication requirements.
To ensure compliance with design rules:
- Use design rule checking (DRC) software to identify and address violations early in the design process.
- Familiarize yourself with industry standards and best practices for PCB design, such as IPC standards.
- Document design rules and constraints to ensure consistency across design iterations and team members.
By addressing these common challenges and implementing best practices, you can create PCB designs that are optimized for performance, reliability, and manufacturability.
Conclusion
In conclusion, PCB design might seem daunting at first, but it’s totally doable with the right guidance. Throughout this guide, we have covered the basics of PCB design, from understanding its importance to navigating through the key steps of the process.
So, whether you are just starting out or looking to improve your skills, remember that PCB design is something anyone can learn. With a little practice and some help along the way, you will be designing your own PCBs like a pro in no time.